


Welcome!

Search this site
Honey on Instagram
This error message is only visible to WordPress admins
Error: No feed found.
Please go to the Instagram Feed settings page to create a feed.
-
Recent Posts
Recent Comments
- Anonymous on Quick and Easy Chocolate Cake (Dairy and Egg Free!)
- Anonymous on Quick and Easy Chocolate Cake (Dairy and Egg Free!)
- Anonymous on Quick and Easy Chocolate Cake (Dairy and Egg Free!)
- keikiwahineuiokalani on Quick and Easy Chocolate Cake (Dairy and Egg Free!)
- Chanell on Halloween Costumes 2014- Little Red Riding Hood and Clan
Archives
Categories
Meta
Author Archives: Savanna
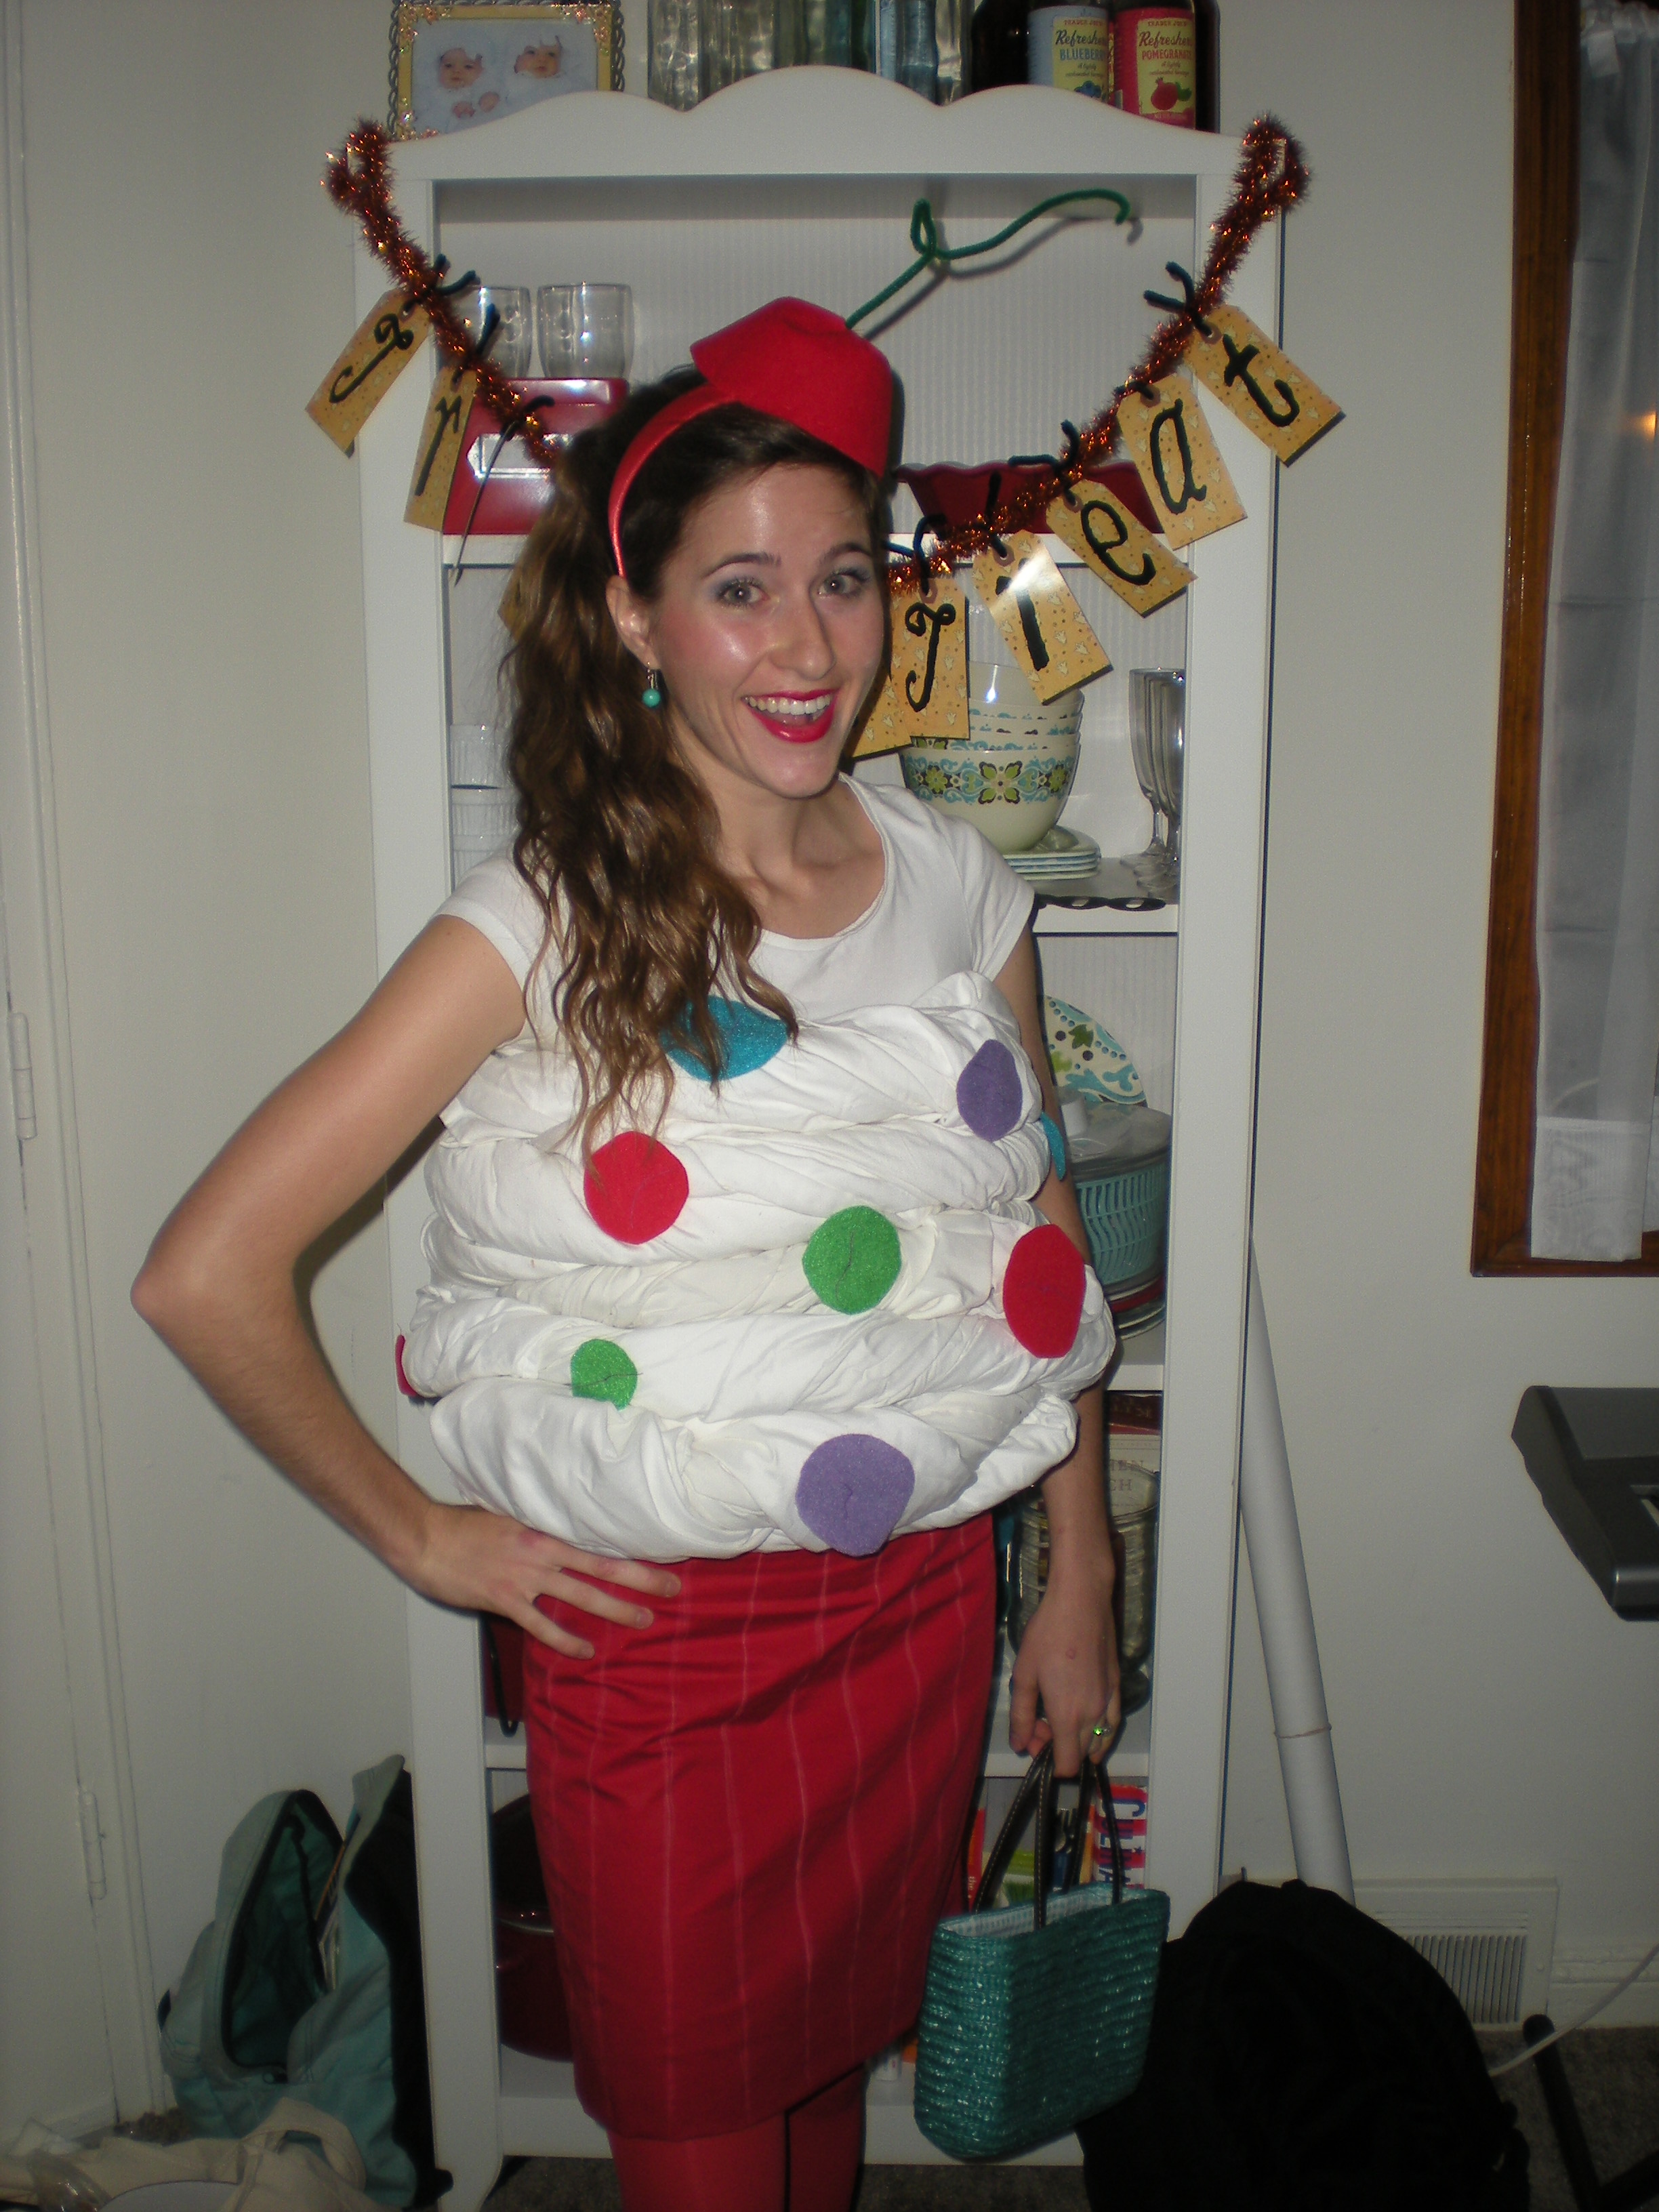
Halloween Costumes 2010- Cupcake and Baker

I love Halloween and especially getting to dress up. I think others find it quite humorous that I get just as excited as my kids to put on a costume! I think I rather embarrassed a friend one year on Halloween when she picked me up to run errands together and I was fully dressed as a black cat. Haha!
And what’s even better is the creation of the costume. I was completely shocked when I found out how expensive costumes are! So, in Savanna tradition, costumes have always been made, and I think they look so much cuter and more special (even though they are very cheaply done!).
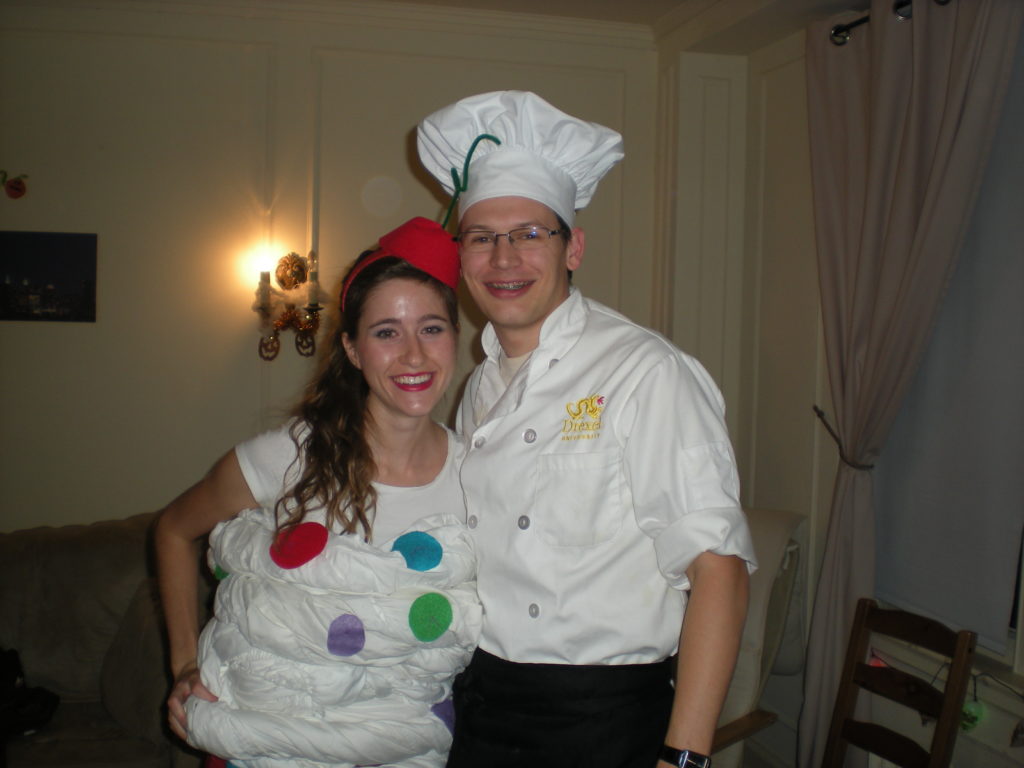
It really started a few years after we were married–the year before we had a baby. Halloween 2010 was the year of the BAKER:

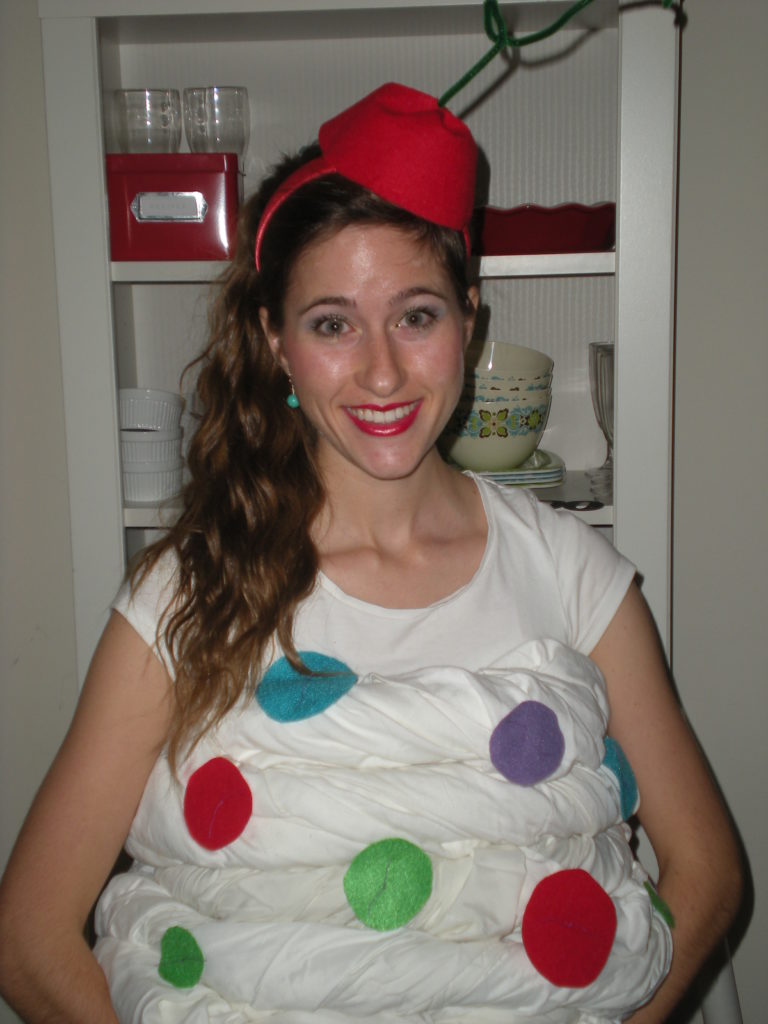
and the CUPCAKE:
I guess the baker one wasn’t “made” but rather assembled (thank you for the multi-purpose uniform, Drexel! 😉 ). How convenient my school uniform fit both of us! I liked the extra touch of flour on his cheeks.

Now starting at the top for my cupcake costume– I got a styrofoam bowl, cut off the lip, poked a hole with a green pipe cleaner for the stem, and covered the bowl in red felt. I taped it to a red headband I already had and voila! a “cherry on top”.

moving down, I twisted one of my bed sheets, wore a white shirt, and then twisted it around my body, tying the two ends of the bed sheet in a knot in back. Once the frosting was securely in place, I attached the felt “sprinkles” with just a little loop with the needle and thread, so that it would be easy to just snip off at the end of the night. Luckily I had a red skirt, tights, and flats. I drew faint white lines onto the skirt with either chalk or a sewing pencil (the type that disappears when wet, I can’t remember which one I used now).

A super cheap and cute couples costume that can be whipped (ha ha) up with very little work! I’ll be going through the years up to this year (which I still have yet to make a single costume! And only a few weeks left ahh!), so stay tuned for Halloween 2011! And you’re definitely not going to want to miss 2012, it was a good one. 🙂
Peaches and Cream Hot Cereal

Nothing warms me up better than a bowl of hot cereal on a crisp fall or winter morning. When I found out over a year ago that I have a severe oat allergy, one of my first thoughts was how I was going to survive without my oatmeal in the morning! Luckily, I discovered other options (that had to be wheat free as well), including millet, buckwheat, and quinoa (made in a creamy way, not dry and fluffy). But my favorite, which my sister-in-law introduced to me, is Bob’s Red Mill “Mighty Tasty Hot Cereal” which is a blend of brown rice, corn, sorghum, and buckwheat.
Since I’m the only one in the house that has allergies (and alternative options are more expensive), this recipe yields one serving, but you could easily double the amount, or make it with cream of wheat or oatmeal (which is how I make it for the kids). The “Mighty Tasty Hot Cereal” doesn’t keep very well, so I only make the amount that will be eaten right away. The coconut milk makes it oh-so-very creamy but I think the real secret to the recipe is the vanilla extract. That is what makes it have an almost peach ice creamy taste! And anything that is reminiscent of dessert for breakfast is a win in my book.
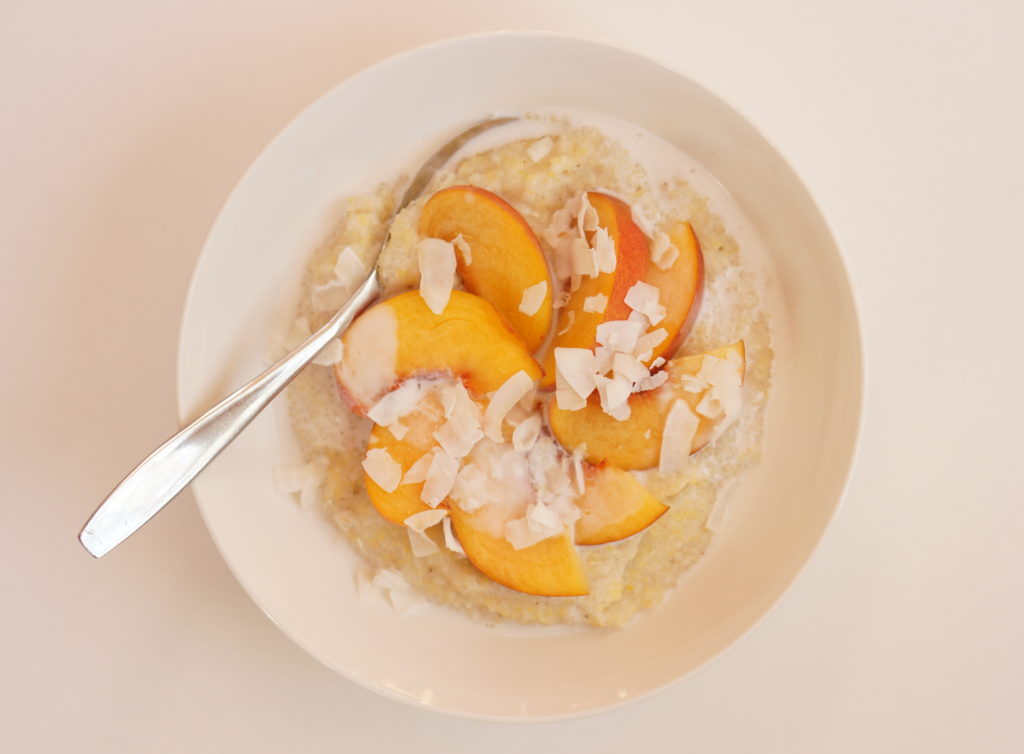
Peaches and Cream Hot Cereal
This bowl will warm you up and will taste like a breakfast treat!
By: Honey On My Spoon
Serves: 1
Ingredients
- ¾ cup water
- ¼ cup Bob's Red Mill "Mighty Tasty Hot Cereal" *
- teeny pinch of salt
- ¼ cup coconut milk**, plus more for pouring on top (from a can, make sure to shake the can before opening!)
- 1 tsp maple syrup
- ¼ tsp vanilla extract
- ½ peach, sliced
- 1 Tbsp coconut flakes (optional)
Instructions
- Boil the water in a pot and stir in the hot cereal and salt.
- Let it cook, covered 6-8 minutes, until water has been absorbed and cereal is cooked.
- Stir in coconut milk and maple syrup, and let it cook another minute or two more if necessary
- Off the heat stir in the vanilla extract.
- Pour into a bowl, top with peaches, and coconut and extra syrup (if desired).
- Drizzle extra coconut milk over it all and enjoy!
Notes
*You can certainly do this with oatmeal or other kind of hot cereal, cooking according to instructions but using slightly less water (to stir in the coconut milk)
**You could also use half and half or heavy cream if you do not need to avoid dairy
**You could also use half and half or heavy cream if you do not need to avoid dairy
Chicken and “Rice” Casserole
Jesse totally makes fun of me for making this dish, because I do NOT do casseroles. I’m really not even a comfort-food cook either for that matter, and casseroles are typically heavy, loaded with dairy and lots of cheese, and just not the way I cook (or can even eat!). But then last year I saw this “casserole” in Danielle Walker’s Against All Grain “Meals Made Simple” cookbook, and I knew I had to try it out. No “cream of” cans in this, and shockingly, there is zero dairy! But yet it is SO delicious and so satisfying, and healthy as the creamy sauce is made from cashews and the “rice” is actually grated cauliflower, that you can happily indulge in this casserole guilt-free! Whenever Jesse walks in and sees this cooking, he is almost a little too excited by the fact that I made a casserole. 🙂 Hah!
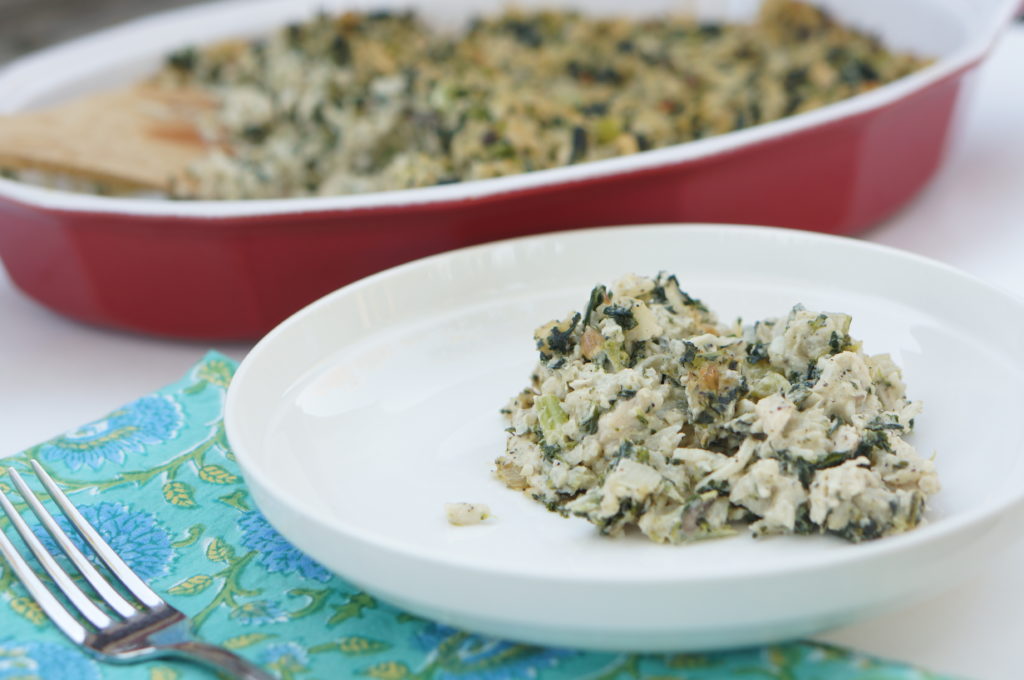
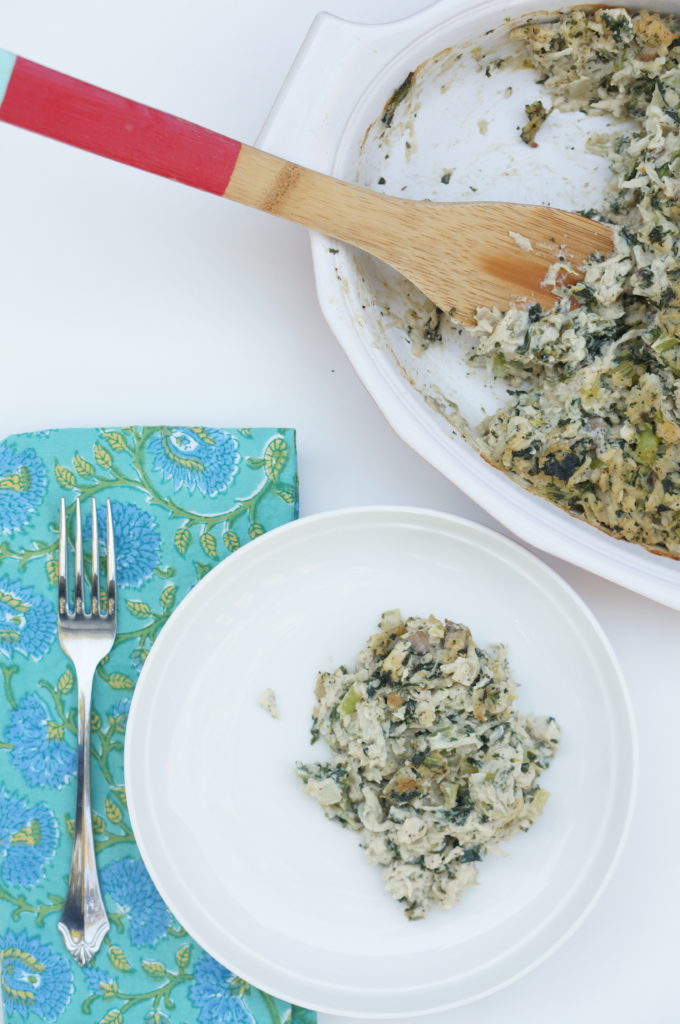
Chicken and "Rice" Casserole
This recipe is adapted from Danielle Walker's Against All Grain "Meals Made Simple" cookbook. It is an elevated and healthier version of a comfort food classic--with all the flavor of your favorite casserole but without all the heavy ingredients!
By: Honey On My Spoon
Ingredients
- SAUCE
- 1 cup raw cashews
- ¾ cup chicken stock (I use the poaching liquid from the chicken)
- 2 tsp dried thyme
- 1 tsp sea salt
- 2 tsp fresh lemon juice
- CASSEROLE
- 3 Tbsp ghee, butter, or olive oil
- 3 cloves garlic, minced
- ½ onion, diced
- 4 oz. mushrooms, finely diced
- 4 cups riced cauliflower*
- 8 oz broccoli florets, chopped
- 1½ tsp sea salt
- ¾ tsp black pepper
- 1-2 chicken breasts, cooked and shredded**
Instructions
- Soak the cashews in a container filled with boiling water for 30 minutes.
- Preheat oven to 375 degrees and grease a casserole dish.
- Saute the onions, garlic, and mushrooms in the ghee (or other) about 3 minutes until onions start to become translucent. Add in the broccoli, salt, and pepper and let it cook several minutes for the broccoli to start to become tender. Add in the cauliflower and turn off the heat.
- To make the sauce, drain the cashews, and place all the ingredients for the sauce into a blender. Blend on high for 30-45 seconds until smooth.
- Stir in the shredded chicken and the sauce into the broccoli mixture, and pour into the casserole dish.
- Cover the dish with foil and bake for 15 minutes. Uncover and bake another 10 minutes.
Notes
*To rice the cauliflower, I use the grater attachment on my food processor to make it go lickity split. I find that one normal large head of cauliflower will yield about 8 cups, which I divide in half and refrigerate the other (works well in place of rice for fried rice too!). You can also use a standard box grater if you do not have a food processor.
**I usually just use one and add extra mushrooms and broccoli (and sometimes I like to add chopped kale too), but you can certainly use two if you want more chicken in there! To poach chicken, I will put the raw chicken in a pot and cover with water. Sometimes I will add some celery or onion to the water as well to help season the chicken, and then let it simmer 25-30 minutes, until cooked through. Alternatively, you could use some leftover roasted chicken, or make it extra easy and use a precooked rotisserie chicken! If you go that route though, I would decrease the amount of salt in the recipe.
**I usually just use one and add extra mushrooms and broccoli (and sometimes I like to add chopped kale too), but you can certainly use two if you want more chicken in there! To poach chicken, I will put the raw chicken in a pot and cover with water. Sometimes I will add some celery or onion to the water as well to help season the chicken, and then let it simmer 25-30 minutes, until cooked through. Alternatively, you could use some leftover roasted chicken, or make it extra easy and use a precooked rotisserie chicken! If you go that route though, I would decrease the amount of salt in the recipe.
School: Part 1
I thought it might be fun on this site to reminisce and share about my time at Drexel University when I studied culinary arts!
In July 2009 I knew I needed a change. The year before, I had been dreaming of someday going to culinary school and I was actually trying to use it as my motivation to get through independent study… When I finished and got my bachelor’s maybe I could go to culinary school! I even contacted several culinary schools and had them mail me out their info. I kept it all in a folder and would look at the fliers and dream.. I had no idea that a few universities have actual bachelors degrees in culinary arts! And as luck would have it, one of those was just a walk away from where we lived in West Philadelphia.
![]()
Everything happened very fast, as that July my family and I researched Universities in the area, but not surprisingly, their deadlines for application had already long passed. That was all but one, Drexel University, which had a “rolling admission” which meant you could turn in an application and be accepted any time. Coincidentally (or by divine providence), a “prospective transfer student information session” was the very next day (Friday), so you bet I cancelled work immediately and showed up at that meeting. I assumed I would finish up my degree in German, Music, or Health Science, since that was what I was studying at BYU (I have WAY too many interests), but at that meeting there was a different area of study that certainly perked my ears and made my heart race…. CULINARY ARTS. I could not even believe it.
I had my transcripts from BYU overnighted, and that Monday I had an interview and was accepted on the spot. I seriously still have goose bumps when I think how everything seemed to work out so perfectly. It really was meant to be.
I have always had a great love of learning and had felt that start to diminish when I was doing the independent study program, plus I have a very competitive nature that happens in a physical classroom with peers, so I could not wait to begin!

I ordered up my required “uniform” for class– hounds-tooth pants, chef jacket, white apron, skull cap, and rubbery shoes–and I went to the Italian market to get my required knife set and pastry equipment and tools. As you can see, the uniform really fit Jesse perfectly. I, on the other hand, always drowned a bit in it… Why don’t they make smaller sizes?! But I think he makes a pretty handsome (and fierce-looking) chef!

I’ll save more for another school installment!
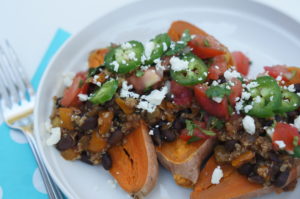
Mexican Loaded Sweet Potatoes
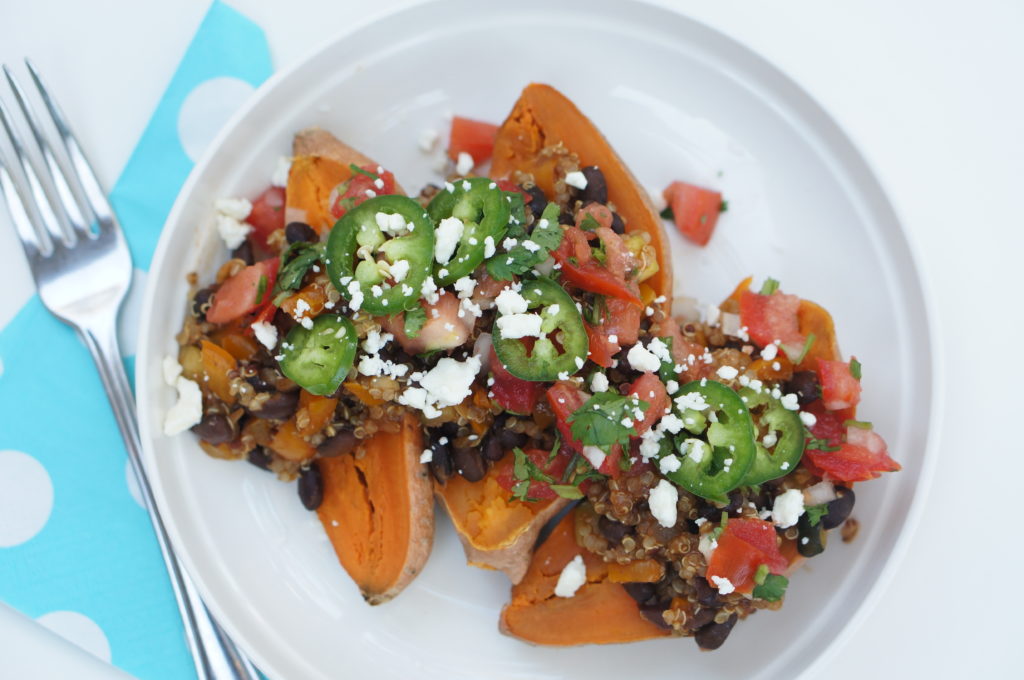
I was on my way home from running errands at 5:30 today (if going to Krispy Kreme dressed like a pirate to get free donuts counts as an “errand”…), and was trying to think what I could make real fast since the hungry husband was going to be home in 30 minutes. I was planning on making stuffed bell peppers, but the husband gently suggested he was really hungry and wanted something quite filling. Plus, I wasn’t really feeling stuffed bell peppers, so forget that idea. I asked him for any ideas— “baked potatoes and chili” he said. hm. Well, his idea did help me, and this meal came about from his suggestion!

But first to address the issue of baking a sweet potato and not having time…. the microwave can be quite the time saver. Although baking is obviously best, when you don’t have time, it works! All of the ingredients are very similar to the ingredients I use to make sweet potato and black bean enchiladas actually, but no tortillas and tedious rolling up needed! Realizing this, I wanted to make a slight sauce with the mixture. Since I didn’t want to make a full on enchilada sauce, I added mexican seasoning, and tomato paste thinned with some of the bean liquid. *and disclaimer, these pictures do show some quinoa in the mixture.. that is just because I had about 1 cup of it in the fridge I needed to use up! But that was the only reason I added it, I did not include it in the recipe and it really is not needed.
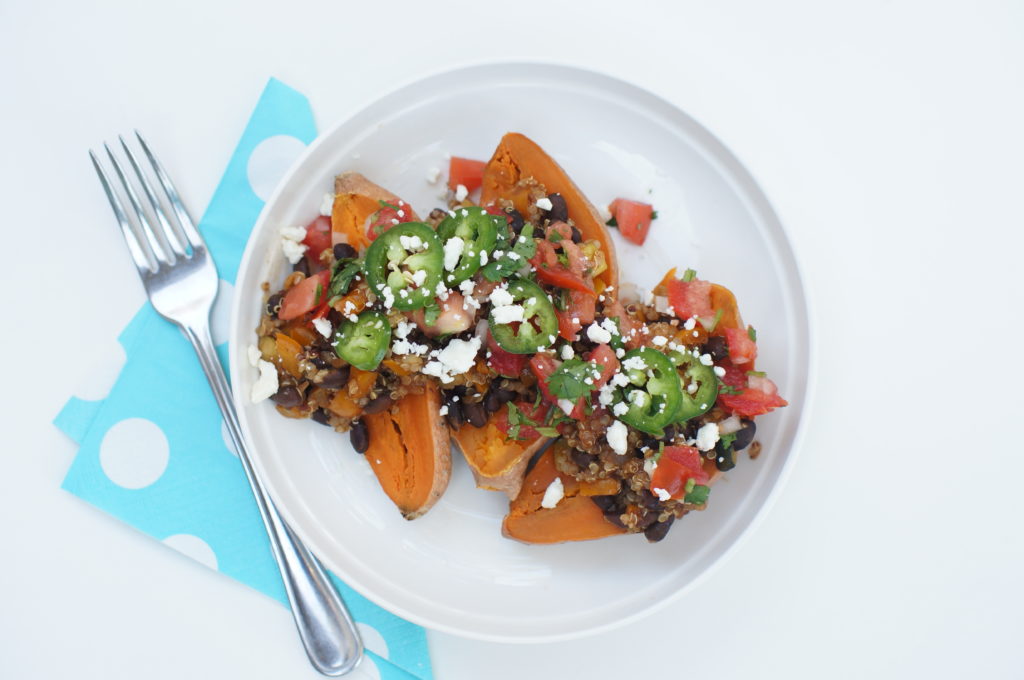
Top with a bright and fresh pico de gallo and any additional toppings, and a colorful and filling dinner is on the table fast!
Mexican Loaded Sweet Potatoes
A quick and filling vegetarian dinner that is full of flavor!
By: Honey On My Spoon
Serves: 4
Ingredients
- 4-6 sweet potatoes
- 2 Tbsp olive or coconut oil
- 1 onion, chopped
- 1 zucchini. diced
- 1 bell pepper, diced (red, orange or yellow)
- 3 garlic cloves, minced
- ¾ tsp salt
- 1 tsp tomato paste
- 2-3 tsp Mexican/Taco Seasoning*, recipe follows
- 1 can black beans, drained and reserve liquid
- optional toppings-- feta/cotija cheese, jalapenos, radishes, guacamole, sour cream
- MEXICAN SEASONING:
- 1 Tbsp chili powder
- 2 tsp cumin
- 1 tsp paprika
- 1 tsp oregano
- ½ tsp garlic
- FOR THE PICO**:
- 2 large tomatoes
- 2 Tbsp onion, diced
- ½ small garlic clove, minced
- ½ lime, juiced
- handful of cilantro
- salt, to taste
Instructions
- Prick sweet potatoes once or twice with a fork and bake on 400 degrees for 45-60 minutes, until a fork can easily pierce through the sweet potato.***
- Make the pico: Slice tomatoes in half, pull out extra liquid and seeds and toss, then diced the tomatoes up. Add in the rest of the ingredients for pico and set aside.
- Heat a large saute pan with the oil and then add the onions, zucchini, bell pepper, garlic, and salt. Cook 5-10 minutes until onions are translucent and zucchini is tender.
- Stir in the tomato paste, then add the drained beans, seasoning, and 3 Tbsp of the bean liquid.
- Let it simmer for 5 minutes, then taste and add more salt/seasoning if needed, and more bean liquid to make it more saucy, if desired.
- To assemble: Slice sweet potatoes in half, lightly sprinkle with salt and pepper, then add the bean and veggie mixture, and top with the pico and any optional toppings.
Notes
*If using storebought, make sure you check if there is salt already added, and decrease the salt in the recipe if there is. To make the mexican seasoning mix, I usually double or triple the recipe and keep it in an empty spice container.
**Need to save time? Use a storebought pico or salsa
***Alternately, if short on time, prick and pop them in the microwave! This takes the cooking from 60 minutes to oh, about 6. 😉 Cook it for 5 minutes first, then see how soft they are and add more time from there. They should not need more than 10 minutes total (mine are done in 6-7 minutes). The skin wont be as good as it is when baked, but seriously, sometimes the time difference is all that matters. 😉
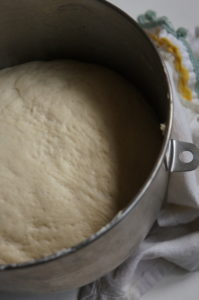
Pizza Dough
*Can I just say how excited I am to finally have this site up and running?!! This is been many months of naptimes in the making. 🙂 I know I will have lots of fun posting and I hope you enjoy it too!

Friday night dinner with my kids means one of three things 1. party/fun food 2. kid friendly food or 3. pizza night! Before we had kids, we had pizza just about every Friday night. You can have so many variations that we never seemed to tire of it and we seemed to have a different type of pizza each week!
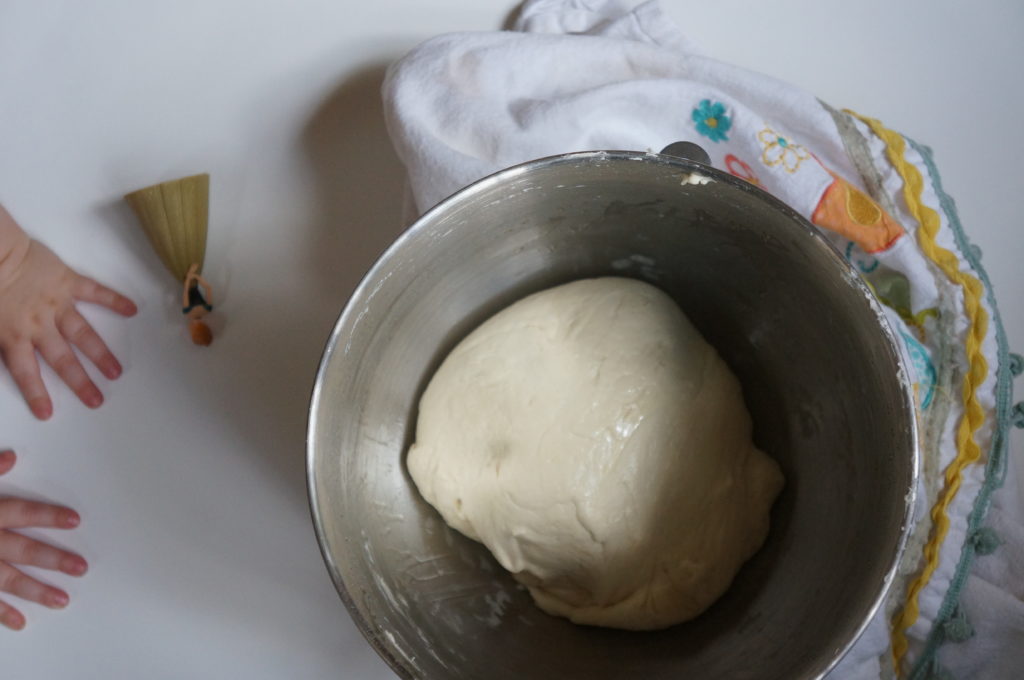
This is my favorite pizza dough recipe and it makes enough for two pizzas, so I usually use one up and stick the other in the freezer! That way I always have one on hand and ready to go. I love making pizza with my kids. It is the perfect meal to involve them as they get to play with their dough and roll it out, and then pick out what toppings they want!
Pizza Dough
This is my go-to pizza recipe. You can vary it by adding herbs, roasted garlic, cheese, etc. I also use this same recipe for breadsticks! If you have a pizza stone, that makes the best crisp crust. Either way, the higher the heat the better-- 475-500 degrees for 10-12 minutes works out well.
By: Honey On My Spoon
Ingredients
- 1½ cups warm water
- 2 tsp yeast (or one pkg)
- 3½ -4 cups flour
- 2 tsp salt
- 2 tsp honey (opt)
- 2 Tbsp EVOO (opt)
Instructions
- Put yeast into a stand mixer and pour water on top (and honey if using). Let sit 5-10 minutes until quite bubbly and foamy.
- Add 3½ cups flour and salt (and the optional EVOO) and mix with paddle until it starts to form a dough.
- Switch to a dough hook and knead on medium low for 3 minutes. Let rest for 5 minutes.
- Knead again for 5 minutes, adding more flour as necessary, so that when you touch the dough with your finger, the dough does not stick. The dough should be smooth and elastic.
- Spray or drizzle some EVOO into the bowl and turn the dough over to coat.
- Cover the bowl with plastic wrap or a cloth, and let rise until doubled in size (at least 45 minutes, preferably 1½-2 hours)*.
- Divide in two and use right away, or place in zip top bag sprayed with oil and refrigerate or freeze.
Notes
* If rising 3-4 hours, punch down and rotate the dough halfway through. The dough can also be refrigerated for several days (which will allow the dough to develop even more flavor).
I made the honey and oil optional because I really only add these half the time when I am feeling like making the extra step and pulling them out. 🙂 Most times, though, I do without and it still tastes great.
I made the honey and oil optional because I really only add these half the time when I am feeling like making the extra step and pulling them out. 🙂 Most times, though, I do without and it still tastes great.